Oil leaking from car usually points to worn seals, loose filters, or gaskets.
You walk to your car, start it, and see fresh spots under the engine. Your heart drops. That oily patch is more than a mess. Oil leaking from car can mean rising costs, damage, and stress. I’ve seen the panic this causes. The good news is simple steps can calm it fast. You can find the source, stop the drip, and protect your engine. The key is knowing when an additive can help and when a repair is smarter. If you want quick relief while you plan a fix, keep reading.
[3-product-listings-blocks]
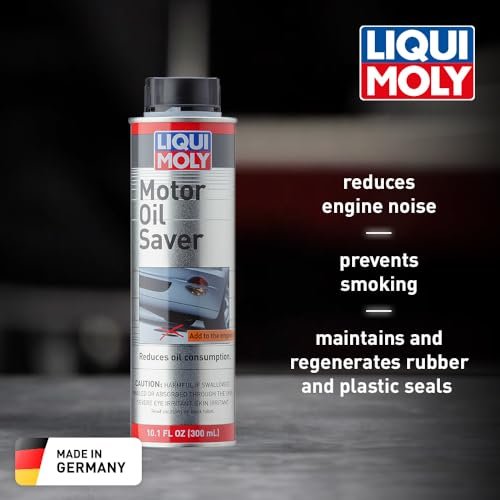
Liqui Moly Motor Oil Saver (300 ml)

This small can targets the root cause of many minor leaks. Rubber seals harden with age and heat. When that happens, oil slips past and drips. Liqui Moly Oil Saver works by refreshing those seals. It helps them swell back to their original size. That can slow or stop a weep without a wrench.
I like it for older engines and high mileage cars. It mixes with the oil in seconds. One 300 ml can treats up to five liters of oil. You then drive as normal. The effect builds over a few hundred miles. Many see a drop in oil use and fewer spots on the driveway.
Pros:
- Targets rubber seals that cause many small leaks
- Easy to use during a routine oil change
- Compatible with many oil types, including synthetic
- Can reduce oil burn and tailpipe smoke in mild cases
- Often cheaper than replacing gaskets right away
- Good for aging engines with light seepage
- No special tools or shop visit needed
- Helps quiet minor ticking due to thin oil film
- Safe for gasoline and diesel engines
- Can buy you time before a major repair
- Small can stores well in a glove box or garage
- Clear, simple instructions on dose and use
Cons:
- Will not fix large leaks or broken parts
- May take a few hundred miles to show full effect
- Not a replacement for a failing gasket that is torn
My Recommendation
If you notice a light oil film under the car, start here. It is best for small leaks at seals and gaskets. Think valve cover weeps, cam seals, or a light oil pan seep. It will not repair a ripped gasket or a cracked pan. But it can slow an oil leaking from car situation while you plan a proper repair.
Use this if you want a quick, low-cost step. Add it right after an oil change for best results. Give it a few weeks and check again. For heavy drips, go straight to a mechanic. For minor leaks, this Oil leaking from car is a smart first move that can save cash and stress.
| Best for | Why |
|---|---|
| Minor seal seepage | Refreshes rubber seals to reduce light leaks |
| High-mileage engines | Helps aging gaskets and lowers oil use |
| Budget quick fix | Fast, low-cost relief while you plan repairs |
Why oil leaking from car matters more than a stain
Engine oil is the blood of your engine. It cools, cleans, and protects. If it leaks, the oil level drops. The engine then runs hot and dry. That can speed up wear. In a worst case, the engine can seize. A small leak today can become a large repair tomorrow.
Oil leaks are also a safety risk. Oil can drip onto a hot exhaust. That can cause smoke or a fire. It can also coat belts and mounts. That can lead to slips and damage. Finally, oil on the road is a hazard to other drivers. So, do not ignore it.
Oil leaks are messy too. They stain driveways and garages. They smell bad when oil burns on the exhaust. They make Oil leaking from car hard to check other parts. Because every check shows oil film. Fixing an oil leaking from car early keeps life simple and clean.
Common causes of oil leaking from car
Most leaks come from seals and gaskets. Rubber gets hard over time. Heat and chemistry speed that up. Here are the most common spots I check first.
- Valve cover gasket: Oil on the top of the engine or near spark plugs
- Oil filter or filter housing: Fresh oil around the filter or its base
- Oil drain plug: Drips at the pan after an oil change
- Oil pan gasket: A wet lower edge of the engine
- Front and rear main seals: Oil at the front pulley or between engine and transmission
- Camshaft seals: Oil near the timing cover on overhead cam engines
- Oil pressure sensor: Wet sensor body and wiring plug
- PCV system issues: Excess crankcase pressure pushes oil out of seals
- Turbo oil feed/return lines: Wet lines and smoking near the turbo area
- Head gasket failure (rare for external oil leaks): Oil mixing or oil along the block seam
The cause decides the cure. A loose filter needs a twist. A worn valve cover gasket needs a new one. A dry seal may respond to an additive. A crack in a pan needs a pan. That is why I diagnose before I buy anything.
How to identify an oil leak fast
Start with a clean slate. Wipe the area with a rag and a mild cleaner. Then drive a short loop. Park. Check again with a light. Fresh oil stands out on a clean surface. This simple step can save an hour of guessing.
Check the color and smell. Engine oil is brown to black. It smells like oil, not sweet or sharp. Trans fluid is red to brown. Coolant is green, orange, or pink and smells sweet. Brake fluid is clear to amber and very thin. If you see oil leaking from car, confirm it is engine oil.
Look from the top down. Check the valve cover rim. Look at the oil cap and PCV hose. Then move lower. Inspect around the filter, drain plug, and pan. Use a small mirror for tight spots. If you cannot tell, add a UV dye to the oil. Drive 10 to 20 miles. Shine a UV light at night. The dye glows and shows the path.
Is it safe to drive with an Oil leaking from car ?
It depends on rate and location. A slow seep is often safe for short trips. But check the dipstick daily. A heavy drip is risky. Oil can hit hot exhaust parts. That can smoke or catch fire. If the leak is near belts, stop. Oil on belts can cause slips and loss of power steering.
Watch the oil pressure light. If it flickers, stop the car. Do not hope it goes away. The engine needs oil now. Running low even once can cause wear you cannot see. Think bearings, cams, and timing parts. If in doubt, top up or tow.
DIY checks before you buy anything
I do a few fast checks before I spend a dime. They take minutes and can stop the leak on the spot.
- Verify the oil cap is tight and its gasket is not torn
- Inspect the PCV valve and hose for clogs or cracks
- Check the oil filter is the correct part and snug, not cross-threaded
- Confirm the drain plug is tight and has the right washer
- Look for oil at sensors and tighten as needed with care
- Clean the area, drive, and recheck to find the true source
These steps fix many cases. A loose filter is common after quick oil changes. A bad PCV is cheap and simple. Both can cause oil leaking from car and heavy smells. Fix the root and the leak stops.
When to use an additive vs when to repair
Additives work by restoring rubber seals. They do not glue cracks. They cannot repair a torn gasket or a warped cover. If oil pours out while parked, do not use an additive. Get a repair quote. If you have a light seep, an additive is a good test.
Here is how I decide. If I see a thin oil film at a seal, I try a seal conditioner. If there is a drop every few minutes, I plan a repair. If oil is on the exhaust and smokes, I fix it now. Safety first. Additives can buy time. They are not magic.
Repairs vary. A valve cover gasket is often a simple job. An oil pan can be more work. A rear main seal is major. The cost can range from low to high. That is why a $10 to $20 oil top-up or a small can of seal saver can be smart for mild leaks.
Step-by-step: Using an oil stop leak additive the right way
Here is the simple way to use a seal conditioner like Liqui Moly.
- Warm the engine for a few minutes so the oil flows
- Shut off the engine and wait one minute
- Shake the can well
- Pour the full can into the oil fill neck
- Start the engine and idle for two minutes
- Drive as normal; do not overfill the oil
- Watch the dipstick weekly and check for new spots
- Expect results after a few hundred miles of mixed driving
Do not add more than the label says. Do not stack products. One product at a time is safer. If you still see oil leaking from car after a few weeks, plan a repair. That means the leak is too big for a chemical fix.
Cost breakdown: Additives vs repairs
Money matters. Here is the simple math I share with drivers who ask me for help.
- Additive test: Low cost and low risk for mild leaks
- Valve cover gasket: Often mid-range cost; many shops can do it fast
- Oil pan gasket: More labor; some cars need subframe work
- Rear main seal: High labor; transmission removal on most cars
- Oil pressure sensor: Low to mid cost; part plus short labor time
- PCV parts: Low cost; big effect on crankcase pressure
In many cases, a small additive saves weeks of topping off. It helps you plan and budget. But do not delay a major leak fix. Big leaks only get worse. The longer you wait, the higher the bill. A smart plan blends both steps. Try the cheap fix where it fits. Repair what the can cannot touch.
Environmental and warranty notes
Oil on the ground is bad for streams and soil. Clean any spill with kitty litter or an oil absorbent. Dispose of it at a proper site. Most parts stores accept used oil and absorbents. Use drip pans under known leaks. Keep the streets clean and safe.
If your car is under powertrain warranty, ask before you add products. Many OEMs allow basic oil additives. Some do not. If the car is new or leased, stick to OEM guidance. Keep receipts and note what you used. That protects you later.
Prevention tips that really work
I like to say the best fix is the one you never need. Here is how to prevent an oil leaking from car in the first place.
- Change oil on time with the right spec and viscosity
- Use quality filters with good anti-drainback valves
- Inspect the PCV system every service interval
- Torque drain plugs and filters to spec, not by feel
- Replace crush washers with each oil change if used
- Inspect gaskets during other repairs and replace when brittle
- Keep the engine bay clean to spot issues early
These habits stop many leaks before they start. They also make the car easier to service. A clean engine tells the truth. You can see every seep in seconds.
Mistakes to avoid
Some mistakes create leaks or make them worse. Avoid these common errors.
- Overfilling oil; high levels force oil out of seals
- Using the wrong viscosity; too thin oil can slip past clearances
- Mixing multiple stop leak products at the same time
- Ignoring a PCV fault that causes high crankcase pressure
- Over-tightening filters or drain plugs; this crushes gaskets
- Skipping a new drain plug washer when required
Small choices have big results. The right oil and the right torque can prevent an oil leaking from car for years. Keep tools simple. Use a torque wrench and a filter wrench for the best results.
Troubleshooting after treatment: What to expect
Many drivers ask me what comes next after they add a stop leak product. Here is the normal timeline. In the first week, you might see the same stains. Do not judge yet. The product needs time and heat cycles to work.
By week two or three, check the same spots. You may see fewer drops or a lighter film. Top off if needed. If the leak slows, good. Keep driving and watch the dipstick. If there is no change by one month, the leak is too large. Plan a proper repair. It is better to spend on a fix than burn oil and hope.
Real-world scenarios I see often
Here are a few common cases and the best first steps. They cover most oil leaking from car issues I see with friends and readers.
- Fresh oil after an oil change: Check filter tightness and drain plug washer
- Oil on the front of the engine: Inspect front main seal and timing cover
- Oil on the top of the engine: Check valve cover gasket and PCV hose
- Oil between engine and transmission: Suspect rear main seal; confirm with dye
- Oil on the exhaust and smoke: Park it; fix now due to fire risk
- Oil at the oil pressure switch: Replace the sensor; common and cheap part
- Oil at turbo lines: Inspect banjo bolts, crush washers, and return hose
Each case has a simple test. Clean. Drive. Recheck. Dye if needed. Then choose an additive or a repair. Do not guess. Guessing costs more than a light and a rag.
Driving and monitoring tips during a leak
If you must drive while you sort the fix, use smart habits. Park over cardboard to track fresh drops by count and size. Check oil weekly. Carry a quart of the right oil in the trunk. Keep a small funnel and gloves in a zip bag. Oil leaking from car keeps the trunk clean.
Use a simple log in your phone. Note the date and dipstick level. Note any new smells or smoke. A pattern will show fast. This makes the next step clear. When oil leaking from car is under control, you will feel the stress drop.
Signs the leak is urgent
Stop and plan a tow if you see any of these. They are red flags in my book. They point to high risk and high damage fast.
- Oil pressure light on, even for a few seconds
- Smoke from under the hood or the back of the car
- Large puddle that grows while parked
- Burning oil smell inside the cabin
- Oil on belts or near hot exhaust parts
Your safety matters more than a schedule. If you see these, do not risk it. Tow the car and fix the source. Oil leaking from car will cost less than an engine rebuild.
How viscosity and oil choice affect leaks
Oil weight matters. Thinner oil flows faster. In a loose engine, it can leak more. Many drivers see less seepage with the correct viscosity stated by the maker. A thicker grade can mask a leak, but it may hurt cold starts. Follow the manual first. If the car has high miles and leaks, ask a pro about a high mileage blend.
High mileage oils have seal conditioners. They can help stop small leaks over time. They are not as strong as a dedicated product. But they work slowly and gently. That is ideal for long term use. Choose quality brands with the right specs for your engine.
What to tell your mechanic
When you do visit a shop, share clear notes. It saves time and cash. Tell them when you first saw the leak. Say where you park and how far you drive each day. Share any work done right before the leak. Mention any products you added.
Ask for a clean test. Many shops will clean, add dye, and drive. Then they show you the true source under a light. Pictures help you see and trust the fix. Ask for the old parts back. A good shop will say yes. That builds trust.
FAQs Of oil leaking from car
How do I know it is engine oil and not another fluid?
Engine oil is brown to black and feels slick. It smells like oil. Coolant is often green or orange and smells sweet. Trans fluid is red to brown. Brake fluid is clear and thin. Use a white paper towel to compare.
Can I drive with a small oil leak?
Yes, for short trips if it is a slow seep. Check the dipstick weekly. Watch for smoke and smells. If the oil light flickers or you see heavy drips, stop and tow.
Will a stop leak additive damage my engine?
Good products are safe when used as directed. They condition seals. They do not clog passages. Do not overuse. Do not mix many products. Follow the label.
How long does it take for an additive to work?
Plan on a few hundred miles. Heat cycles help seals respond. Check weekly. If nothing changes after a month, schedule a repair.
What if oil leaking from car gets worse suddenly?
Park and inspect. A sudden increase means a new fault. Check the filter, drain plug, and sensor. If you cannot find it fast, tow the car. It is safer.
Final Verdict: Which Should You Buy?
If you face a mild oil leaking from car, start with Liqui Moly Motor Oil Saver. It is a simple, low-cost step that often helps aging seals.
For heavy drips or smoke, plan a repair first. Use additives as support, not a cure. Your engine and wallet will thank you.
That’s smart timing—like choosing the right moment for a clean cut. 🩺
Going during non-peak hours means less stress, more attention, and better results. With empty lanes, the crew can guide you properly, work carefully, and deliver a clean that actually shows.